 HYDRAULIC BASICS
  HYDRAULIC COMPONENTS
 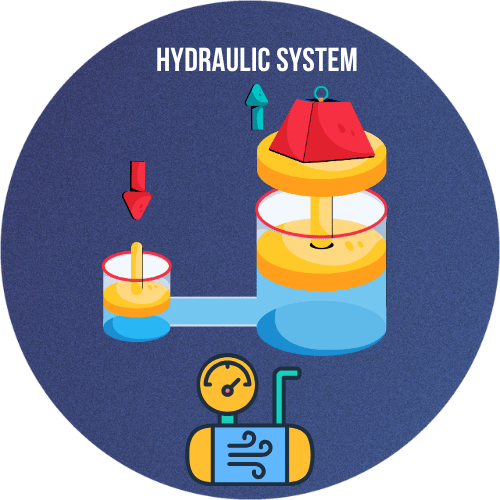 HYDRAULIC SYSTEM
  HYDRAULIC SYMBOLS
  HYDRAULIC STANDARDS
  HYDRAULIC CALCULATORS
  HYDRAULIC TOOLS
  BUYER’S GUIDES
How Control Valves Work ?
Contents
- 1 1. What Is a Control Valve?
- 2 2. Main Components of a Control Valve
- 3 3. How Does a Control Valve Work?
- 4 4. Control Valve Operating Principles
- 4.1 Pressure Drop Across the Valve
- 4.2 Control Valve Flow Capacity
- 4.3 Cv and Kv Conversion
- 4.4 Force Balance in a Pneumatic Actuator
- 4.5 Valve Travel and Flow Capacity
- 4.6 Inherent and Installed Characteristics
- 4.7 Valve Authority
- 4.8 Feedback Control Principle
- 4.9 PID Control
- 4.10 Direct and Reverse Controller Action
- 4.11 Rangeability
- 4.12 Cavitation, Flashing, and Choked Flow
- 5 5. Control Valve Actuators and Their Operation
- 6 6. Control Valve Flow Characteristics
- 6.1 Inherent Flow Characteristic
- 6.2 Installed Flow Characteristic
- 6.3 Linear Flow Characteristic
- 6.4 Equal-Percentage Flow Characteristic
- 6.5 Quick-Opening Flow Characteristic
- 6.6 Comparison of Flow Characteristics
- 6.7 Characterized Rotary Valves
- 6.8 Positioner Characterization
- 6.9 Rangeability
- 6.10 Effect of Valve Oversizing
- 6.11 Effect of Valve Undersizing
- 6.12 Selecting a Flow Characteristic
- 7 7. Fail-Safe Positions and Control Valve Actions
- 8 8. Common Control Valve Operating Problems
- 8.1 Hunting and Oscillation
- 8.2 Stiction
- 8.3 Deadband
- 8.4 Oversized Control Valve
- 8.5 Undersized Control Valve
- 8.6 Cavitation
- 8.7 Flashing
- 8.8 Choked Flow
- 8.9 Excessive Noise
- 8.10 Internal Seat Leakage
- 8.11 External Leakage
- 8.12 Slow Valve Response
- 8.13 Instrument-Air Problems
- 8.14 Positioner Problems
- 8.15 Valve and Process Troubleshooting
- 9 9. Control Valve Selection, Maintenance, and Best Practices
- 9.1 Define the Process Conditions
- 9.2 Size the Valve Correctly
- 9.3 Select the Appropriate Valve Type
- 9.4 Choose Suitable Materials
- 9.5 Select the Required Flow Characteristic
- 9.6 Determine the Failure Position
- 9.7 Size the Actuator
- 9.8 Specify the Positioner and Accessories
- 9.9 Installation Best Practices
- 9.10 Commissioning and Calibration
- 9.11 Preventive and Predictive Maintenance
- 9.12 Use Smart Valve Diagnostics
- 9.13 Maintain Accurate Documentation
- 10 Conclusion
Control valves are essential elements in industrial process control systems. They regulate process variables such as flow rate, pressure, temperature, and liquid level by changing the size of the flow passage in response to a signal from a controller.
Unlike manual valves, control valves operate automatically and continuously adjust their position to maintain the desired process conditions. They are widely used in oil and gas facilities, chemical plants, power stations, water treatment systems, food processing lines, pharmaceutical production, and many other industrial applications.
A typical control loop includes a sensor or transmitter, a process controller, and a control valve. The transmitter measures the actual process variable and sends this information to the controller. The controller compares the measured value with the desired setpoint and sends a corrective signal to the valve. The valve then opens, closes, or moves to an intermediate position to reduce the difference between the measured value and the setpoint.
Understanding control valve operation is important for selecting the correct valve, improving process stability, reducing energy consumption, preventing equipment damage, and maintaining safe plant operation. This article explains the basic construction, operating principles, flow characteristics, actuator types, fail-safe actions, and common operating problems associated with control valves.
1. What Is a Control Valve?

A control valve is a power-operated device used to regulate fluid flow by varying the size of the flow passage. It acts as the final control element in an automated process control loop.
The fluid passing through a control valve may be:
- Liquid
- Gas
- Steam
- Slurry
- Two-phase fluid
- Corrosive or hazardous process media
The valve receives a signal from a control system and moves its closure element to a specific position. Depending on the valve design, the closure element may be a plug, ball, disk, or segmented component.
For example, when a process requires a higher flow rate, the controller may command the valve to open further. If the flow rate is too high, the valve moves toward the closed position. This continuous adjustment allows the process variable to remain close to its required setpoint.
Primary Functions of a Control Valve
A control valve can perform several process-control functions:
- Regulate flow rate through a pipeline
- Reduce or maintain downstream pressure
- Control the pressure inside a vessel
- Maintain the liquid level in a tank
- Regulate temperature by controlling heating or cooling media
- Control the ratio of two process streams
- Protect equipment from abnormal operating conditions
The valve does not directly measure these variables. Instead, it responds to a signal generated by the process controller based on measurements from transmitters or sensors.
Control Valve in a Process Control Loop
A basic closed-loop control system operates through the following sequence:
- A sensor measures the process variable.
- A transmitter sends the measured value to the controller.
- The controller compares the measured value with the setpoint.
- The controller calculates the required correction.
- An output signal is sent to the control valve.
- The valve changes its position and adjusts the process flow.
- The sensor measures the updated process condition, and the cycle repeats.
This feedback process occurs continuously. In modern industrial systems, the controller is commonly part of a distributed control system (DCS), programmable logic controller (PLC), or dedicated process controller.
Common control signals include:
| Signal type | Typical range |
|---|---|
| Pneumatic | 3–15 psi |
| Analog electrical | 4–20 mA |
| Digital | HART, FOUNDATION Fieldbus or Profibus |
| Hydraulic | Application-dependent pressure |
Control Valve vs. Manual Valve
The main difference between a control valve and a manual valve is how its position is adjusted.
| Feature | Control valve | Manual valve |
|---|---|---|
| Operation | Automatic | Hand-operated |
| Positioning | Continuously adjustable | Adjusted by an operator |
| Control signal | Pneumatic, electrical, hydraulic or digital | Not normally required |
| Main purpose | Process regulation | Isolation or occasional adjustment |
| Response | Continuous and relatively fast | Depends on operator action |
| Control-system integration | Directly integrated | Usually limited |
Manual valves can sometimes be throttled, but they are generally unsuitable for continuous and precise process control. Control valves are specifically designed to respond repeatedly and accurately to changing operating conditions.
Common Types of Control Valves
Control valves can be classified according to their body design and closure movement.
Linear-motion control valves
The closure element moves in a straight line relative to the valve seat. Common types include:
- Globe valves
- Angle valves
- Three-way valves
- Diaphragm valves
Globe valves are widely used where accurate throttling, stable control, and high pressure-drop capability are required.
Rotary-motion control valves
The closure element rotates to change the flow area. Common types include:
- Ball valves
- Segmented ball valves
- Butterfly valves
- Eccentric plug valves
Rotary valves are often selected for higher flow capacity, compact installation, lower weight, and reduced pressure loss.
2. Main Components of a Control Valve

A complete control valve assembly normally consists of the valve body, internal trim, bonnet, actuator, positioner, and several accessories. Each component contributes to the valve’s ability to regulate flow accurately and safely.
Valve Body
The valve body is the main pressure-containing component. It provides the flow passage, connects the valve to the pipeline, and supports the internal parts.
The body must be suitable for the process conditions, including:
- Design pressure
- Operating temperature
- Fluid type
- Corrosion potential
- Erosion risk
- Pipeline size
- Required end connections
Common body materials include carbon steel, stainless steel, alloy steel, bronze, and corrosion-resistant alloys. Typical connections include flanged, threaded, socket-weld, and butt-weld ends.
Valve Trim
Valve trim refers to the internal components directly involved in controlling the fluid. Depending on the valve type, the trim may include:
- Valve plug
- Seat or seat ring
- Cage
- Stem
- Ball
- Disk
- Shaft
- Retainer
The trim determines much of the valve’s flow capacity, control characteristic, shutoff performance, noise level, and resistance to cavitation, flashing, corrosion, and erosion.
Special trim designs may be used for severe-service applications. Examples include multi-stage pressure-reduction trim, low-noise trim, anti-cavitation trim, hardened trim, and balanced trim.
Closure Element
The closure element changes the effective flow area through the valve. Its form depends on the valve design:
| Valve type | Typical closure element |
|---|---|
| Globe valve | Plug |
| Ball valve | Full, reduced or segmented ball |
| Butterfly valve | Disk |
| Eccentric plug valve | Rotary plug |
| Diaphragm valve | Flexible diaphragm |
The position of the closure element determines how much fluid can pass through the valve.
Valve Seat
The seat provides the sealing surface against which the closure element closes. The quality and material of the seating surfaces influence the valve’s leakage classification and service life.
Control valves may use:
- Metal seats for high-temperature, high-pressure or erosive service
- Soft seats for tighter shutoff
- Replaceable seat rings for easier maintenance
- Hardened seating surfaces for severe-service applications
A control valve should not automatically be treated as an isolation valve. If bubble-tight shutoff is required, the valve and seat must be selected for the appropriate leakage class.
Valve Stem or Shaft
In a linear-motion valve, the stem connects the actuator to the valve plug and transfers the actuator’s linear force.
In a rotary valve, a shaft transfers actuator torque to the ball, disk, or rotary plug. The stem or shaft must withstand the mechanical loads produced by pressure, friction, packing, and fluid forces.
Bonnet
The bonnet closes the upper opening of the valve body and provides support and guidance for the stem. It also contains the packing arrangement that limits process-fluid leakage along the stem.
Common bonnet configurations include:
- Standard bonnet
- Extended bonnet for high- or low-temperature service
- Bellows-seal bonnet for hazardous or toxic fluids
- Cryogenic bonnet for extremely low-temperature applications
The bonnet is normally bolted, threaded, welded, or integrally formed with the valve body.
Packing
Packing forms a seal around the valve stem while still allowing it to move. Common packing materials include PTFE, graphite, and engineered low-emission materials.
Packing must be tight enough to prevent process leakage but not so tight that excessive stem friction develops. High packing friction can cause poor positioning, deadband, stick-slip movement, and unstable control.
Actuator
The actuator provides the force or torque needed to move the valve. It converts a pneumatic, electrical, or hydraulic input into mechanical movement.
The main actuator types are:
- Pneumatic diaphragm actuators
- Pneumatic piston actuators
- Electric actuators
- Hydraulic actuators
- Electro-hydraulic actuators
Pneumatic diaphragm actuators are common in process plants because they are simple, responsive, reliable, and compatible with spring-return fail-safe operation.
The actuator must be sized to overcome:
- Fluid pressure forces
- Seat load
- Packing friction
- Stem or shaft friction
- Required shutoff force
- Safety factors for the application
Positioner
A valve positioner ensures that the actual valve position matches the control signal. It receives the controller command, measures the valve’s position, and adjusts the actuator pressure or output until the requested position is reached.
For example, a 50% controller signal should typically move the valve to approximately 50% of its calibrated travel.
Positioners improve:
- Positioning accuracy
- Response speed
- Repeatability
- Throttling performance
- Compensation for friction
- Actuator performance under changing process forces
Smart digital positioners may also provide valve diagnostics, travel feedback, friction monitoring, calibration functions, partial-stroke testing, and communication through protocols such as HART or FOUNDATION Fieldbus.
I/P Converter
An electrical-to-pneumatic current converter, commonly called an I/P converter, changes an electrical control signal into a pneumatic pressure signal.
A typical conversion is:
4–20 mA = 3–15 psi
The typical signal relationship is:
| Electrical input | Pneumatic output |
|---|---|
| 4 mA | 3 psi |
| 12 mA | 9 psi |
| 20 mA | 15 psi |
At 4 mA, the pneumatic output is normally 3 psi. At 12 mA, the output is approximately 9 psi, while an input of 20 mA produces approximately 15 psi. Many modern valve positioners include an integrated I/P converter, so a separate converter may not be required.
Additional Control Valve Accessories
A complete control valve assembly may also include:
- Air filter regulator
- Pressure gauges
- Volume booster
- Pneumatic relay
- Solenoid valve
- Limit switches
- Position transmitter
- Lock-up valve
- Quick-exhaust valve
- Handwheel
- Travel stop
- Air reservoir
These accessories may improve response, provide position indication, enable emergency shutdown, maintain the valve position during air failure, or allow local manual operation.
The required accessories depend on the valve’s control function, fail-safe requirements, actuator volume, stroke speed, available utilities, and plant safety philosophy.
3. How Does a Control Valve Work?

A control valve regulates fluid flow by changing the size of the passage through the valve body. The valve’s closure element—such as a plug, ball, or disk—moves in response to a signal from the process control system.
Opening the valve increases the available flow area and normally allows more fluid to pass through it. Closing the valve reduces the flow area, increases flow resistance, and normally decreases the flow rate.
A control valve usually operates as the final control element in a closed-loop process control system.
Basic Control Loop Sequence
A typical control valve loop works as follows:
- A sensor measures a process variable such as flow, pressure, temperature, or liquid level.
- A transmitter converts the measurement into an electrical or pneumatic signal.
- The transmitter sends the measured value to a controller.
- The controller compares the measured value with the required setpoint.
- The controller calculates the necessary correction.
- The controller sends an output signal to the valve positioner or actuator.
- The actuator moves the valve to the required position.
- The resulting change in flow affects the process variable.
- The transmitter measures the updated condition, and the cycle repeats.
This continuous feedback process keeps the measured process variable as close as possible to the desired setpoint.
Example of Temperature Control
Consider a heat exchanger that uses steam to heat a process fluid.
If the measured temperature falls below the setpoint, the controller sends a signal instructing the steam control valve to open further. More steam flows into the heat exchanger, increasing the process temperature.
As the temperature approaches the setpoint, the controller reduces its output and moves the valve toward a more closed position.
If the measured temperature rises above the setpoint, the controller closes the valve further to reduce the steam flow.
From Controller Signal to Valve Movement
Many industrial controllers use a 4–20 mA electrical output signal.
A typical signal relationship is:
| Controller output | Electrical signal |
|---|---|
| 0% | 4 mA |
| 25% | 8 mA |
| 50% | 12 mA |
| 75% | 16 mA |
| 100% | 20 mA |
The electrical signal is normally sent to an electro-pneumatic valve positioner. The positioner converts the electrical command into pneumatic pressure and supplies that pressure to the actuator.
A traditional I/P converter may produce the following relationship:
| Electrical input | Pneumatic output |
|---|---|
| 4 mA | 3 psi |
| 12 mA | 9 psi |
| 20 mA | 15 psi |
This relationship is only a common example. The actual valve position depends on the positioner calibration, actuator configuration, valve action, and fail-safe requirements.
Role of the Valve Positioner
The positioner ensures that the actual valve position matches the position requested by the controller.
It performs the following sequence:
- Receives the controller output signal.
- Measures the actual valve stem or shaft position.
- Compares the requested position with the actual position.
- Increases or decreases actuator pressure.
- Stops adjusting the pressure when the valve reaches the requested position.
For example, if the controller requests 60% valve travel but the valve is only at 55%, the positioner supplies additional pressure to the actuator until the required position is reached.
A positioner helps the valve overcome:
- Packing friction
- Actuator spring force
- Fluid forces acting on the closure element
- Mechanical resistance
- Changes in differential pressure
It can also improve positioning accuracy,Response, repeatability, and response speed.
How a Pneumatic Control Valve Works
A pneumatic control valve uses compressed instrument air to operate the actuator.
In a spring-and-diaphragm actuator, air pressure acts on a flexible diaphragm. The resulting force moves the diaphragm and actuator stem against the spring.
When the air pressure changes, the balance between pneumatic force and spring force changes. This causes the valve stem and closure element to move.
Depending on the actuator arrangement, increasing air pressure may:
- Open the valve, known as air-to-open operation
- Close the valve, known as air-to-close operation
If the air supply fails, the spring moves the valve toward its designed fail-safe position.
How an Electric Control Valve Works
An electric actuator uses an electric motor and gear mechanism to operate the valve.
The actuator receives an electrical command from the control system. The motor then runs in the opening or closing direction until the valve reaches the requested position.
An internal position sensor provides feedback to the actuator controller. Limit switches or torque switches prevent the valve from travelling beyond its allowable range.
Electric actuators are useful where instrument air is unavailable. However, an additional spring, battery, capacitor, or stored-energy system may be required if the valve must move to a safe position during a power failure.
How Valve Position Affects Flow
The valve changes flow by creating a variable restriction in the pipeline.
When the valve moves toward the closed position:
- The available flow area decreases.
- Fluid velocity through the restriction may increase.
- The pressure drop across the valve increases.
- The flow rate normally decreases.
When the valve moves toward the open position:
- The available flow area increases.
- Flow resistance decreases.
- More fluid can normally pass through the valve.
However, 50% valve travel does not necessarily produce 50% of the maximum flow. The actual relationship depends on the valve trim, flow characteristic, pressure drop, and resistance of the entire piping system.
Modulating and On/Off Operation
A modulating control valve can operate at any position between fully closed and fully open. It continuously changes position to maintain the process variable near its setpoint.
An on/off valve normally operates in only two positions:
- Fully open
- Fully closed
Although some valve body types may be used for either service, a modulating control valve requires suitable trim, actuator control, positioning accuracy, and resistance to continuous throttling.
4. Control Valve Operating Principles

A control valve operates by introducing a controlled restriction into a piping system. This restriction creates a pressure drop and changes the flow rate through the valve.
Its performance is governed by several related principles, including differential pressure, flow capacity, force balance, valve travel, system resistance, and feedback control.
Pressure Drop Across the Valve
Fluid flows through a valve because the upstream pressure is higher than the downstream pressure.
The valve pressure drop can be written in a WordPress-friendly format as:
Valve pressure drop = Upstream pressure − Downstream pressure
Or:
ΔP = P1 − P2
Where:
- ΔP is the pressure drop across the valve.
- P1 is the upstream pressure.
- P2 is the downstream pressure.
When the valve closes partially, the flow passage becomes smaller. Fluid velocity increases through the restricted area, and some pressure energy is converted into velocity, turbulence, sound, and heat.
The flow rate therefore depends on both the valve opening and the pressure difference available across the valve.
Two identical valves at the same opening can pass different flow rates if their upstream and downstream pressures are different.
Control Valve Flow Capacity
The flow capacity of a control valve is commonly expressed using the Cv coefficient.
Cv is the number of US gallons of water at 60°F that can flow through the valve in one minute with a pressure drop of 1 psi.
For a liquid under suitable non-choked turbulent-flow conditions, the simplified relationship is:
Flow rate = Cv × square root of (pressure drop ÷ specific gravity)
Using common symbols:
Q = Cv × √(ΔP ÷ SG)
Where:
- Q is the liquid flow rate in US gallons per minute.
- Cv is the valve flow coefficient.
- ΔP is the valve pressure drop in psi.
- SG is the liquid specific gravity relative to water.
This simplified equation should not be used without correction when the service involves high viscosity, cavitation, flashing, choked flow, or significant piping effects.
Cv and Kv Conversion
Kv is the metric flow coefficient. It represents the volume of water in cubic metres per hour that passes through a valve with a pressure drop of 1 bar.
The approximate relationship is:
Cv = 1.156 × Kv
The reverse conversion is:
Kv = 0.865 × Cv
Valve manufacturers normally provide Cv or Kv values at different valve positions for each body and trim combination.
Force Balance in a Pneumatic Actuator
The actuator must produce enough force to move the valve and hold it at the required position.
The basic pneumatic force relationship is:
Actuator force = Air pressure × Effective actuator area
Using common symbols:
F = P × A
Where:
- F is the actuator force.
- P is the applied pneumatic pressure.
- A is the effective diaphragm or piston area.
The total actuator output must overcome:
- Spring force
- Packing friction
- Stem or shaft friction
- Fluid forces acting on the plug, ball, or disk
- Required seat load
- Seal friction
- Mechanical resistance
In a spring-and-diaphragm actuator, the valve reaches a stable position when the pneumatic force is balanced by the spring force and the other forces acting on the valve assembly.
Valve Travel and Flow Capacity
Valve travel describes how far the closure element has moved between the fully closed and fully open positions.
In a linear-motion valve, travel is the vertical movement of the stem and plug. In a rotary valve, travel is normally expressed as an angular rotation.
The relationship between valve travel and flow capacity depends on the trim design. The main inherent flow characteristics are:
- Linear
- Equal percentage
- Quick opening
A valve at 50% travel does not always provide 50% flow because the available pressure drop changes with system conditions.
Inherent and Installed Characteristics
The inherent flow characteristic is measured with a constant pressure drop across the valve. It mainly reflects the geometry of the valve trim.
The installed flow characteristic is the actual relationship between valve position and flow after the valve is installed in a process system.
The installed characteristic is influenced by:
- Pipeline resistance
- Pumps and compressors
- Heat exchangers
- Filters and strainers
- Upstream and downstream pressure changes
- Parallel flow paths
- Other equipment in the system
For this reason, a valve with an inherent linear characteristic may not provide linear flow after installation.
Valve Authority
Valve authority describes the proportion of the variable system pressure drop that occurs across the control valve.
It can be written as:
Valve authority = Valve pressure drop ÷ Total variable-system pressure drop
A more detailed expression is:
Valve authority = ΔPv ÷ (ΔPv + ΔPs)
Where:
- ΔPv is the pressure drop across the fully open valve at design flow.
- ΔPs is the pressure drop across the rest of the variable-flow system.
If valve authority is too low, changes in valve position may have limited or highly nonlinear effects on system flow.
Correct sizing and appropriate allocation of pressure drop improve valve authority and control performance.
Feedback Control Principle
Most control valves operate in a negative-feedback loop.
The controller compares the process variable with the setpoint. The difference between them is called the control error.
The relationship is:
Control error = Setpoint − Process variable
Or:
Error = SP − PV
Where:
- SP is the desired setpoint.
- PV is the measured process variable.
The controller changes its output in the direction required to reduce this error.
For example, if a flow rate is below its setpoint, the controller may open the valve further. The increased flow reduces the difference between the measured value and the setpoint.
PID Control
Many industrial control loops use a PID controller. PID stands for proportional, integral, and derivative.
- Proportional action responds to the current error.
- Integral action responds to error accumulated over time.
- Derivative action responds to how quickly the error is changing.
Controller tuning affects how the valve responds to process changes.
Aggressive tuning can cause hunting and oscillation. Weak tuning may result in slow response and extended deviation from the setpoint.
Direct and Reverse Controller Action
Controller action determines how the output changes when the measured process variable increases.
With direct action, controller output increases as the measured variable increases.
With reverse action, controller output decreases as the measured variable increases.
The correct controller action depends on:
- The process function
- Whether opening the valve increases or decreases the process variable
- Whether the valve is air to open or air to close
- The required fail-safe position
Incorrect action creates positive feedback and drives the process farther away from its setpoint.
Rangeability
Rangeability is the ratio between the maximum controllable flow and the minimum controllable flow.
The relationship is:
Rangeability = Maximum controllable flow ÷ Minimum controllable flow
For example, a rangeability of 50:1 means that the maximum controllable flow is theoretically 50 times the minimum controllable flow under specified test conditions.
Actual installed turndown may be lower because of:
- Valve oversizing
- Changing differential pressure
- Packing friction
- Seat leakage
- Positioner limitations
- Measurement accuracy
- Cavitation or choked flow
Cavitation, Flashing, and Choked Flow
As liquid passes through the restricted area of a control valve, its local pressure decreases.
If this pressure falls below the liquid’s vapour pressure, vapour bubbles form.
If the pressure later recovers above the vapour pressure, the bubbles collapse. This condition is called cavitation.
Cavitation can cause:
- Noise
- Vibration
- Surface pitting
- Trim erosion
- Unstable control
- Premature valve failure
If the downstream pressure remains below the vapour pressure, the bubbles do not collapse inside the valve. This condition is called flashing.
Flashing creates high-velocity two-phase flow and may cause severe erosion of the valve body and downstream piping.
Choked flow occurs when reducing the downstream pressure further no longer produces an increase in flow rate. It can occur in both liquid and gas service and must be considered during valve sizing.
5. Control Valve Actuators and Their Operation
A control valve actuator supplies the force or torque needed to move the valve’s closure element. It converts pneumatic pressure, electricity, or hydraulic pressure into mechanical movement.
The actuator must be able to:
- Move the valve through its complete travel
- Hold the valve at the commanded position
- Overcome packing and seal friction
- Overcome process-fluid forces
- Produce the required shutoff force
- Operate at the required speed
- Move the valve to its specified failure position
Linear and Rotary Actuators
A linear actuator produces straight-line motion. It is commonly used with:
- Globe valves
- Angle valves
- Diaphragm valves
- Pinch valves
A rotary actuator produces angular movement, commonly through approximately 90 degrees. It is generally used with:
- Ball valves
- Butterfly valves
- Plug valves
- Segmented-ball valves
Some actuators use rack-and-pinion, scotch-yoke, lever, or gear mechanisms to convert the available actuator force into rotary torque.
Pneumatic Diaphragm Actuators
A pneumatic diaphragm actuator uses instrument air acting on a flexible diaphragm.
As air pressure increases, the diaphragm moves and compresses the actuator spring. When pressure decreases, the spring moves the diaphragm and stem in the opposite direction.
The approximate force generated by the air pressure is:
Pneumatic force = Air pressure × Effective diaphragm area
Pneumatic diaphragm actuators are widely used because they provide:
- Simple construction
- Reliable throttling performance
- Fast response
- Spring-return fail-safe action
- Relatively low maintenance
- Good compatibility with hazardous-area applications
Their limitations include moderate thrust, limited travel, and dependence on a clean and reliable instrument-air supply.
Pneumatic Piston Actuators
A pneumatic piston actuator uses compressed air acting on a piston inside a cylinder.
It can normally operate at higher air pressure and generate more force than a diaphragm actuator of comparable size.
Piston actuators may be:
- Single acting
- Double acting
- Linear
- Rotary
A single-acting actuator uses air pressure to move in one direction and a spring to return in the opposite direction.
A double-acting actuator uses air pressure for movement in both directions.
Piston actuators are commonly used for:
- Large control valves
- High-pressure applications
- Rotary valves
- High shutoff-force requirements
- Fast-stroking service
- Applications requiring long travel
A double-acting actuator does not inherently move to a predetermined position after air failure. Additional equipment may be required to achieve the desired failure action.
Electric Actuators
An electric actuator uses an electric motor, gear train, and drive mechanism to move the valve.
The actuator receives an electrical command and rotates the motor in the opening or closing direction. An internal position sensor provides feedback and stops the motor when the valve reaches the required position.
Electric actuators offer:
- No requirement for instrument air
- Convenient electrical integration
- Accurate positioning
- Remote control and diagnostics
- Suitability for isolated installations
- Low power consumption while holding position in many designs
Potential limitations include slower operation, mechanical gear wear, hazardous-area requirements, and the need for stored energy when fail-safe action is required.
Possible fail-safe provisions include:
- Mechanical springs
- Batteries
- Capacitors
- Uninterruptible power supplies
- Separate hydraulic systems
Hydraulic Actuators
A hydraulic actuator uses pressurized liquid to generate mechanical force or torque.
Because hydraulic fluid is nearly incompressible, hydraulic actuators can provide high force, rigid positioning, and high power density.
They are commonly considered for:
- Large valves
- High-pressure pipelines
- Emergency shutdown valves
- Offshore installations
- Subsea systems
- Applications requiring very high torque or thrust
Hydraulic systems require a pressurized supply or power unit, filters, reservoirs, tubing, and control components. Hydraulic leakage and fluid cleanliness must be carefully managed.
Electro-Hydraulic Actuators
An electro-hydraulic actuator combines electrical control with hydraulic power.
An electric motor or pump generates hydraulic pressure, while electrical signals control the direction and position of the actuator.
Self-contained electro-hydraulic actuators can provide high output without connection to a central hydraulic power unit. Stored hydraulic energy may also move the valve to a safe position if electrical power fails.
Single-Acting and Double-Acting Actuators
A single-acting actuator uses external power for movement in one direction and a spring or another stored-energy source for the return movement.
A double-acting actuator uses external power for movement in both directions.
| Feature | Single-acting actuator | Double-acting actuator |
|---|---|---|
| Powered movement | One direction | Both directions |
| Return movement | Spring or stored energy | Applied air or hydraulic pressure |
| Inherent fail-safe action | Normally available | Normally not inherent |
| Available operating force | Partly opposed by the spring | High force in both directions |
| Typical application | Fail-safe control service | High-force or high-torque service |
Air-to-Open Operation
In an air-to-open valve, increasing actuator air pressure moves the valve toward the open position.
With a conventional spring-return arrangement, loss of air allows the spring to close the valve. Therefore, an air-to-open valve is commonly associated with fail-closed operation.
This arrangement may be used where stopping the process flow is the safest response to an air-supply failure.
Air-to-Close Operation
In an air-to-close valve, increasing actuator air pressure moves the valve toward the closed position.
With a conventional spring-return arrangement, loss of air allows the spring to open the valve. Therefore, an air-to-close valve is commonly associated with fail-open operation.
This configuration may be used for cooling water, minimum-flow recycle, or other services where maintaining flow is the safer failure response.
Actuator Sizing
The actuator must be sized for the most demanding operating condition rather than normal service alone.
The sizing calculation should consider:
- Maximum differential pressure
- Required seat load
- Packing and seal friction
- Fluid forces
- Valve size and trim design
- Spring force
- Available air or hydraulic pressure
- Required stroke time
- Valve orientation
- Appropriate design margin
For linear valves, sizing is generally based on thrust. For rotary valves, it is based on torque.
An undersized actuator may fail to move the valve fully or achieve the required shutoff. An excessively large actuator may increase cost, apply unnecessary force to the seat, and cause harsh valve movement.

Contents1 1. What Is a Hydraulic System?2 2. The Science Behind Hydraulic Systems3 3. Main Components of a Hydraulic System3.1 Hydraulic Reservoir (Tank)3.2 Hydraulic Fluid3.3 Hydraulic Pump3.4 Control Valves3.5 Hydraulic Actuators3.6 Hoses, Pipes, and Fittings3.7 Filters and Cooling Devices3.8 Pressure Gauges and Sensors4 4. Step-by-Step: How a Hydraulic System Works4.1 Step 1: Hydraulic Fluid Is […]

Contents1 1. Basics of Hydraulic Pressure1.1 1. What Is Hydraulic Pressure?1.2 2. Pascal’s Law — The Foundation of Hydraulics1.3 3. How Hydraulic Pressure Is Created1.4 4. Units Used to Measure Hydraulic Pressure1.5 5. Why Hydraulic Pressure Is So Powerful1.6 6. Everyday Examples of Hydraulic Pressure2 2. Importance of Understanding Hydraulic Pressure2.1 1. Ensures Safe Operation2.2 […]

Contents1 1. What Is Pascal’s Law?1.1 1.1 Definition of Pascal’s Law1.2 1.2 Mathematical Representation1.3 1.3 Example in Practice1.4 1.4 Historical Context1.5 1.5 The Importance of Pascal’s Law in Engineering2 2. Scientific Principles Behind Pascal’s Law2.1 2.1 The Nature of Fluids2.2 2.2 Pressure in a Fluid at Rest2.3 2.3 Pressure and Surface Area2.4 2.4 Closed System […]